"Like" my Facebook page for more pictures & updates

Thursday, 12 December 2013

Poached Eggs with Rolled Smoked Salmon & Arugula

Sometimes when we have the time and the mood, we will cook something a little 'fancy'. And this is one of them. It's a fun way to eat your proteins and vegetables.

We love it with cracked black pepper (and a tinge of salt on the eggs)

And here's the recipe for all to try out. Have fun :)

Ingredients:
1.    Fresh eggs (this is very important)
2.    White vinegar
3.    Smoked Salmon
4.    Arugula
5.    Black Pepper
6.    Salt (optional)

Instructions for Poached Eggs:
1.    Bring water to boil in a pot and lower the heat so that the water is no longer boiling. Add 1-2 teaspoon of white vinegar. The vinegar helps to congeal the egg white more easily.
2.    Crack an egg and place the egg in a small bowl. Using a spoon or ladle, stir the boiled water in a circular motion. Remove spoon or ladle and gently slide the egg into the center of the pot. Do this one egg at a time. Depending on the size of your pot, you may cook 2 eggs at a time.
3.    Turn off the heat and cover the pot. Let it sit for 5 minutes until the egg whites are cooked. For a slightly more solid yolk texture, keep the heat low instead of turning it off.
4.    Lift the eggs out of the pot with a clean ladle and place it on your serving plate. Sprinkle some cracked black pepper (and optionally, a tinge of salt) to taste.

Instructions for Rolled Smoked Salmon with Arugula:
1.    Separate the salmon into very thin slices (smoked salmon should separate naturally into slivers) on a serving plate.
2.    Place the arugula on the salmon slices and roll the salmon over the arugula. The amount of arugula to be rolled is subject to personal preference.
3.    It’s now ready to be served! Enjoy.

We love that it's a little done and not too runny but if you like you can always turn off the flame and take out the egg on the 5 minute dot.


Eve & Roy

Monday, 14 October 2013

Tutorial : Using a Blender Pen

Sometimes we remember an awesome product we once used .... and my blender pen is one of such thing!

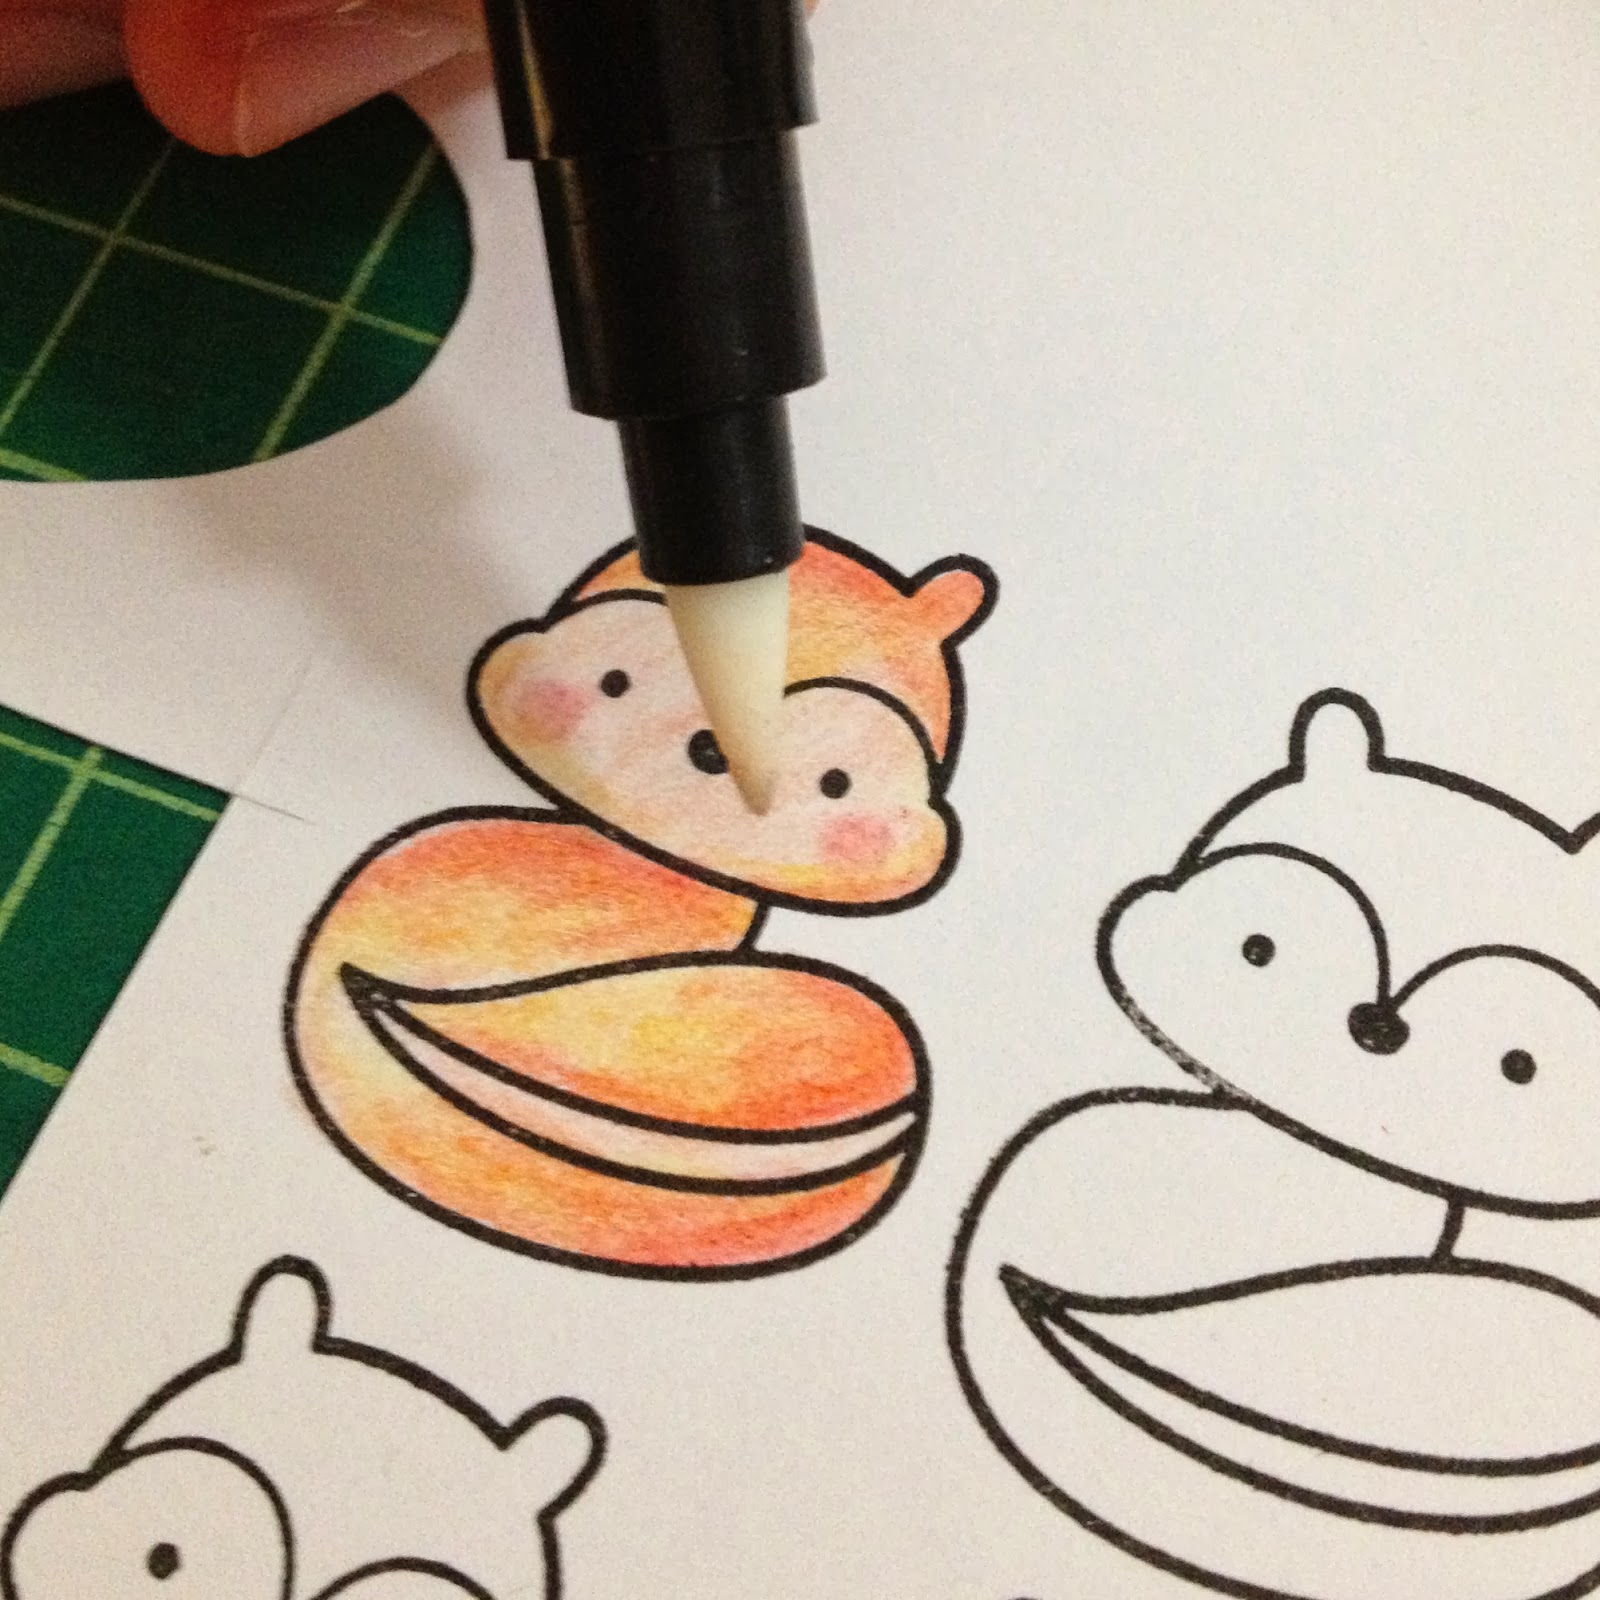
I was stamping some cute images from Lawn Fawn the other night and was contemplating on what to use to color them. I wanted it to have a watercolor-ish effect but I don't have any distress markers.

But I do have a blender pen and color pencils :)

So, here's a step-by-step on how I use the blender pen to create an effect similar to what distress markers could.


1. Stamp your chosen images. Here I chose Lawn Fawn's Into the Woods cute little animals.


2. Color your images with color pencils.


It's not necessary to make sure they are very evenly applied. Add in darker shades wherever you need them.


3. Here's where the magic starts.


4. Using the blender pen, 'color' the lighter colored areas first.


5. Clean the tip of the blender pen and then blend the darker colored areas into the lighter ones. If the color is too dark, clean the tip of the pen again by lightly dabbing it on a piece of tissue.


6. Voila! The image is perfectly & evenly colored with shadings and depth :)

Hope you enjoyed this little tutorial. Quick, easy and fun!

Next up, I will be sharing a tutorial using masking gum and watercolor. You will want to keep your eyes out for that!

Eve

Monday, 9 September 2013

Writing Backwards

I promised to post a video of how I write backwards... here it is.


Am still trying to figure out how to write 'normally' and achieve the results I want using my left hand. Maybe I have to adjust the slant more? Advice?

Eve

Friday, 6 September 2013

Practicing Calligraphy

I have another affection besides my love for all things paper and stationeries... I recently fell in love with modern calligraphy! 

I have seen it online for quite a while but did not take the plunge and tried my hands at it but I could not resist anymore and so I went to buy a set of calligraphy pen and ink to get started. I love that this is the dip ink set and not the ones with cartridges. It just makes the experience so much more fun and authentic.


Writing calligraphy as a leftie poses quite a number of challenges. Although I overcame smudging a long time ago... and I could write italics pretty alright (my first taste of calligraphy was 18 years ago, believe you me) but modern calligraphy totally threw me off.. haha... to achieve this effect which is so easy for righties, I have to write backwards!! 

I will post a short clip of how I wrote backwards in the next post!


Eve

Tuesday, 3 September 2013

Illustrated ABC Print

So, I have been busy lately... doing quite a bit of illustration and watercoloring which has been so therapeutic and wonderful :)

Some of the illustrations, I turned into cards and they are currently available at The Buttercup LA. They will soon be available on my online shop too (which is in the works at the moment).


I had so much fun drawing and painting these animals for the print.... I had to research some of them too as I wanted this whole print to be ALL animals only :)


It will be printed without the watermark, of course, and packed in a cello bag with backing to protect the print. This print is 8.5 x 11 inches and printed on 110 lbs white  acid-free cardstock.

As the shop is still in the works, you can purchase my artwork via email at evelintee@gmail.com 
Payments will be made via secure Paypal transactions.

Thanks!


Eve